Installing lawn edging can transform your garden into a tidy and well-defined outdoor space. How to install lawn edging plastic is a simple process that enhances both the appearance and function of your lawn. The plastic edging helps separate the grass from garden beds and keeps your plants in place while preventing overgrowth.
With a few simple steps, you can install the edging quickly and efficiently. Let’s find out how to successfully install plastic lawn edging and create a clean, defined border for your lawn.
Gather All Necessary Materials for Installation
Before starting, gather all the required materials for your project. You will need plastic lawn edging, stakes, a shovel, measuring tape, a garden hose or rope, and scissors or a utility knife. Make sure the plastic edging is long enough to cover the area you want to edge.
Having all the necessary tools at hand guarantees a smooth installation process and prevents unnecessary interruptions. Check that your stakes are durable enough to secure the edging firmly in place. Once you have everything prepared, you are ready to start measuring and marking your edging line.
Measure the Area for Lawn Edging
The next step is to measure the area where you want to install the lawn edging. Use measuring tape to determine the length of the perimeter you will edge. This will help you determine how much plastic edging material you need to cut. For curves or irregular shapes, use a garden hose or rope to outline the area.
Mark the edges clearly to visualize where the plastic edging will sit. Accurate measurements help confirm that that your edging fits well and creates a straight or curved line that enhances your garden’s look.
Mark the Edging Line Precisely
With your area measured, it’s time to mark the line where the edging will go. This step is important for a clean and professional look. Use a garden hose or rope to create curves or straight lines as per your design. For a straight line, use a string tied between two stakes.
Once you have your line marked, use a spade or shovel to lightly outline the path. This gives you a clear guideline to follow when installing the plastic edging. Precision in this step makes sure that the edges will be neat and even throughout the process.
Prepare the Soil for Edging
Now, prepare the soil along the marked line for your plastic edging. Dig a trench around the perimeter, about 3 to 4 inches deep and wide enough to hold the edging securely. The depth of the trench will help the edging sit in place and prevent it from shifting over time.
Make sure to remove any large stones, roots, or debris that could interfere with the edging installation. A clean trench miantains a smooth, stable foundation for your plastic edging. This allows it to be installed properly and securely.
Cut the Plastic Lawn Edging Properly
Once the trench is prepared, cut the plastic lawn edging to the required length. Use scissors or a utility knife to carefully cut the edging material. If you are working with curved areas, be sure to cut the edging into small sections to follow the line smoothly.
Take your time with this step to avoid uneven edges. Properly cutting the plastic guarantees the edging fits perfectly into your trench and provides a clean, consistent look along the lawn’s border.
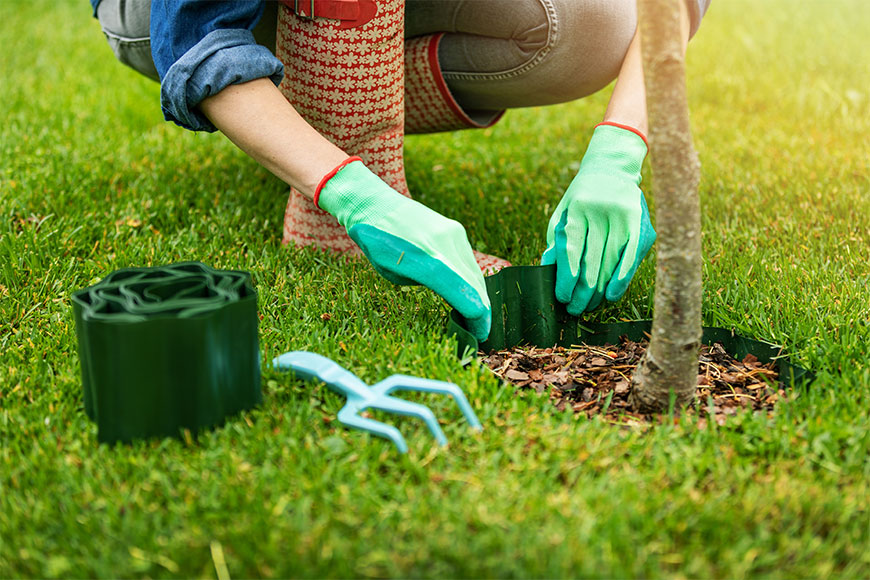
Lay the Plastic Edging Along Line
With the plastic edging cut to size, it’s time to lay it along the marked line. Place the edging into the trench. Make certain that it sits snugly against the edges of the soil. Be certain the plastic edging faces outward to create a clear, neat boundary between your lawn and garden beds.
Gently press the edging into the soil to confirm that it sits flat. This step is important for a smooth and uniform appearance, so take extra care to align the edges as you place the plastic edging along the trench.
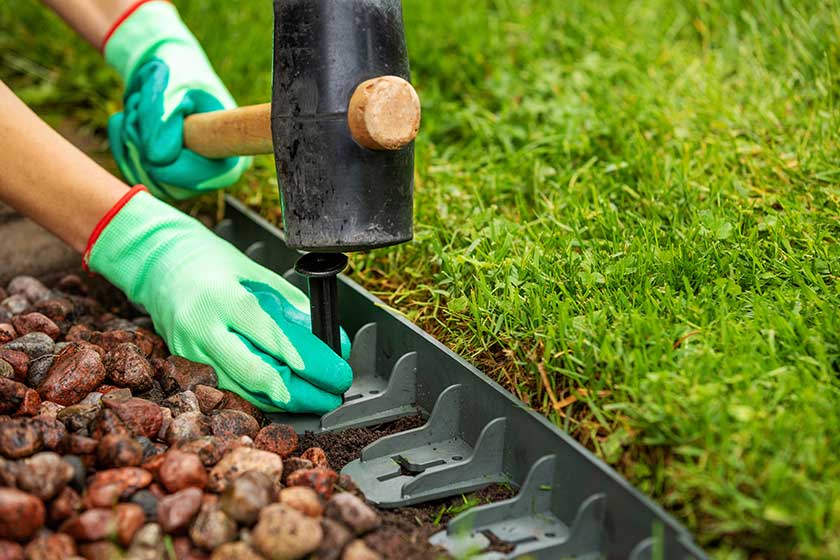
Secure the Plastic Edging with Stakes
Now that the plastic edging is in place, secure it with stakes. Drive the stakes into the ground at regular intervals, about 12 to 18 inches apart, using a hammer or mallet. The stakes should go through the plastic edging and into the soil, holding it firmly in place.
Check that the edging remains straight and aligned as you work, adjusting as necessary. Properly securing the edging helps it stay in place, even with the changing weather or foot traffic in the garden.
Adjust the Edging for Proper Fit
Once the stakes are in place, check the alignment of the plastic edging. Make adjustments as needed to make sure the edging is positioned correctly and fits snugly into the trench. It’s important that the edging is level with the soil, so it doesn’t stick up or create an uneven surface.
Adjusting the edging at this stage guarantees a clean, polished look for your lawn. Take a moment to inspect the fit and make any small changes before moving on to the next step.
Guarantee Edging is Level and Straight
Check the levelness and straightness of the installed edging before finalizing the process. Use a level to make sure the plastic edging sits evenly along the entire length.
If you notice any uneven spots, adjust the edging slightly to level it out. A straight and level edging will make your lawn look more professional and neat. Take the time to correct any imperfections before proceeding, as this will contribute to a more polished and attractive result.
Backfill the Area Around the Edging
Once the plastic edging is properly positioned, backfill the soil around it. Use the soil you removed from the trench to fill in the gaps between the edging and the surrounding lawn.
Press the soil firmly around the edging to keep it in place. Be sure the backfilled area is level with the rest of the lawn. This will help stabilize the edging and create a seamless transition between the lawn and garden beds. The backfill helps the plastic edging remains secure and blends well with the surrounding landscape.
Tamp Down the Soil Around Edging
After backfilling, tamp down the soil around the edging to firm it up. Use a tamper or the flat end of a shovel to press the soil down evenly. This step guarantees that the edging stays in place and doesn’t shift over time.
A firm, compacted base around the edging creates a stable environment for the plastic material to hold its position. Take your time with this step to avoid leaving air pockets or loose soil, which could cause the edging to become unstable.
Trim Excess Edging for Neat Appearance
After securing the edging, trim any excess plastic material for a neat and tidy appearance. Use scissors or a utility knife to cut off any extra edging that extends beyond the edge of the trench.
Confirm that the edges are smooth and straight for a clean look. Trimming the excess guarantees that your lawn has a polished, professional edge and prevents any unsightly overhangs. This step finishes off the installation process and adds to the overall neatness of your lawn.
Add Mulch or Gravel for Stability
To enhance the stability and appearance of your lawn edging, add mulch or gravel around the edging. This helps to further hold the plastic in place and provides an attractive border between the lawn and garden. Mulch or gravel also helps prevent soil erosion, keeping the edging intact for a longer time.
Choose a material that complements your landscape design and works well with your garden beds. Adding mulch or gravel gives your lawn a finished, well-maintained look.
Water the Area to Settle Edging
Water the area around the installed edging to help settle the soil and be sure the edging stays in place. Watering helps to compact the soil and secure the plastic edging further.
After watering, let the area sit for a few hours to allow the soil to settle. This step makes sure that the soil is firmly packed around the edging, preventing movement over time. Proper watering contributes to the stability of the edging and prepares the area for further landscaping tasks.
Inspect the Edging for Stability
Inspect the installed edging to confirm that it is stable and secure. Check that the stakes are holding the plastic edging in place and that the soil around it is compacted.
Look for any areas where the edging may be loose or uneven, and make adjustments as necessary. Ensuring the stability of the edging prevents future issues and helps maintain the overall appearance of your lawn. Regular inspections will keep your lawn looking neat and well-defined over time.
Lawn Edging Installation in Scottsdale AZ, with Covenant Landscapes
Learning how to install lawn edging plastic can be challenging. However, professional lawn edging installation can make it easy. Let Covenant Landscapes help you with your landscaping needs. We specialize in lawn care services that ensure a clean and defined lawn border for your garden.
Contact us today to learn more about our services. We’ll handle the hard work for you, leaving you with a perfectly edged lawn. Enjoy a neat, beautiful garden that enhances your outdoor space with Covenant Landscapes.